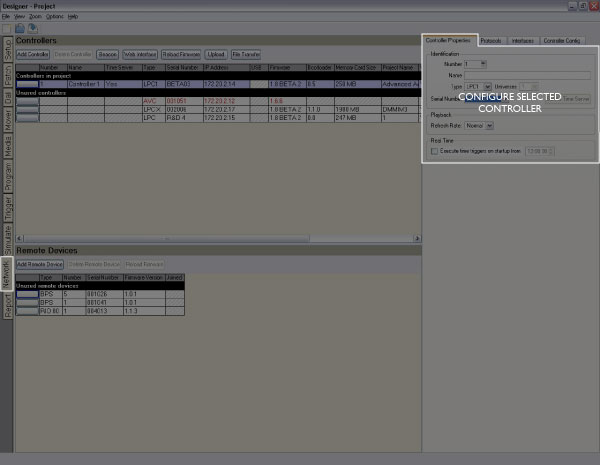
With a Controller selected, choose the Controller Properties tab:
Use these fields to identify a project Controller with a name and type, then associate it with a real Controller and set the Time Server, see Controller Association.
TPC
User interfaces for the TPC are created using the companion Interface Editor application, which is available to download from our website. Browse to the Interface Editor project file to associate it with the selected TPC. Changes to the Interface Editor project file will automatically be detected. To remove the current Interface Editor project file, click the clear button.
Set the backlight brightness for normal operation and for when the TPC has been inactive for a period of time. The inactivity time is also set here, along with the time before the screen turns off completely.
Set whether the backlight brightness should automatically adjust for changes in the ambient light level, and whether the screen should turn on if the proximity sensor detects someone walking up to it.
AVC
AV devices can be configured to set the output format for your connection to the device ("Composite/S-video" or "Component") as well as the input format. Choose a background colour for the video screen (default is black).
In situations where it is necessary to lock the refresh timing of the video screen to be the same as another video signal then you should connect the other video signal to the appropriate AVC's video input and select the "Genlock enabled" option.
IMPORTANT: Genlock is only required in very specific circumstances - such as when the screen is being viewed by cameras - and it should be left unselected in all other situations.
The AVC's default audio level can be set here, the default is main row audio at full (255).
Select between Normal (33Hz: default, recommended), High (44Hz) or Low (20Hz: useful for older fixtures with DMX compatibility issues).
If your project uses realtime or astronomical triggers then, when the Controller starts up, you may well want to assert the correct show state for the current time. You can set each Controller to do this automatically by checking the “Execute realtime triggers on startup” option.
When this option is selected the Controller will execute all the realtime and astronomical triggers that would have fired between the user-specified time and the current time. You should select a time of day when your project is inactive or at its least active. Running all triggers from that point ensures that your project is in the correct state.
Any startup trigger in your project will run first and then any pending realtime or astronomical triggers. The Controller will attempt to preserve the timing so that timelines will be in the correct place as if it had been running normally.
IMPORTANT: Changes made to a Controller's properties will only take effect after an upload.